

How To Layer On Photoshop
Lesson 7: Understanding Layers
/en/photoshopbasics/saving-images/content/
Introduction
Have y'all always wondered how people attain such swell results with Photoshop? While there are many image editing techniques, there's 1 tool Photoshop professionals use with almost every project: layers. Learning how to utilize layers is probably the nigh important thing you tin do to amend your Photoshop skills. In this lesson, we'll comprehend how layers work, the different types of layers, and the basics of creating and using layers.
If you'd like to follow along with the lesson, y'all can download our instance file. We're planning to send this file every bit an email attachment and post information technology online.
What are layers?
You tin can remember of layers as transparent panes of glass stacked on top of one another, which allow different parts of each layer to show through. At that place are several types of layers you'll use in Photoshop, and they autumn into two principal categories:
- Content layers: These layers incorporate different types of content, like photographs, text, and shapes.
- Adjustment layers: These layers allow you to use adjustments to the layers below them, like saturation or brightness. Adjustment layers are a type of nondestructive editing considering they don't actually alter anything virtually the original paradigm.
When using layers, information technology may exist helpful to plough individual layers on and off to encounter how they touch on the image. Yous can do this by clicking the eye icon side by side to each layer name.
Click the eye icons in the interactive below to do turning dissimilar layers on and off. Find how hiding content layers similar the Background layer has a more noticeable effect than hiding adjustment layers like the Adjust Levels layer.
Why use layers?
At this betoken, you may be wondering why y'all even need to employ layers. Wouldn't it only be easier to work with everything in your image at once? The truth is, layers give y'all an astonishing amount of flexibility and control because you lot tin edit each layer independently from the rest of the image. Once you become comfortable with layers, you'll use them all the time.
Layer basics
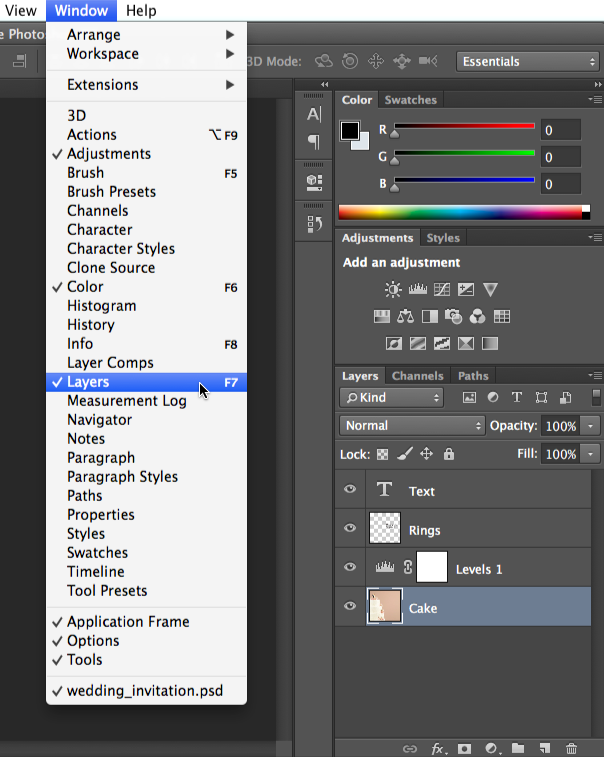
You can view, create, and edit layers with the Layers panel. This will generally be found in the lower-right corner of the screen, although you can always go to Window > Layers to make sure information technology's turned on.
To create an adjustment layer:
If y'all've never used layers, nosotros recommend trying aligning layers first. Remember, an adjustment layer does not contain content; it simply allows you to apply adjustments to the layers below it.
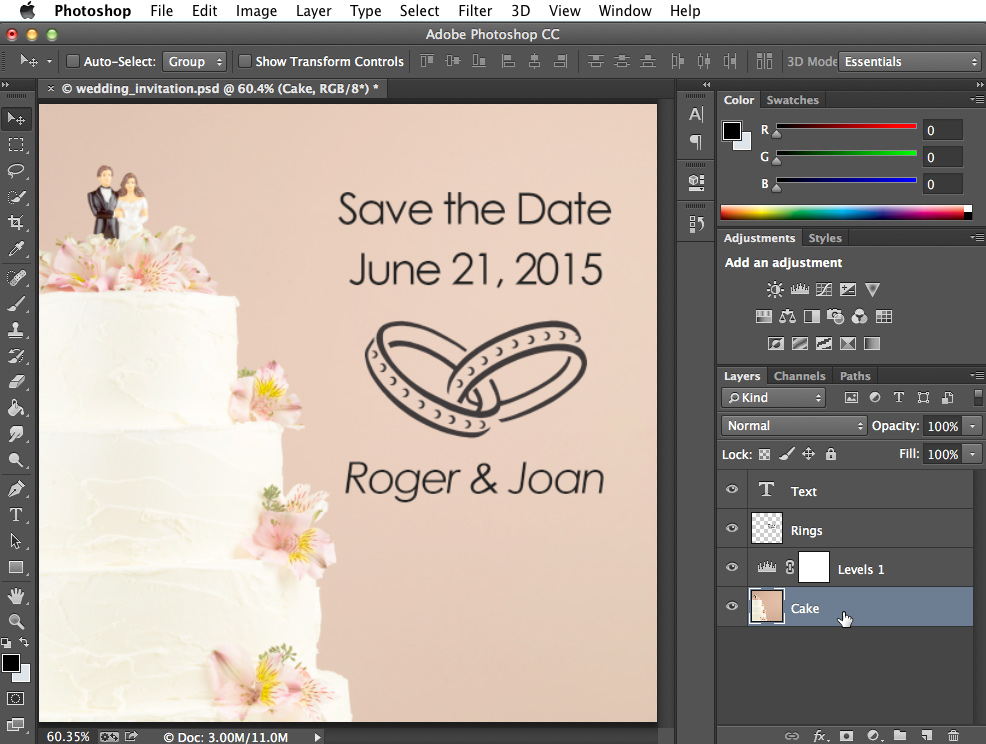
- In the Layers panel, select the layer below where you want the adjustment layer to appear. In our example, we'll select the Cake layer.
- Click the Adjustment button at the bottom of the Layers panel, so choose the desired adjustment.

- The adjustment layer will appear, and you tin and then customize the aligning in the Properties panel. Whatever changes you make volition affect every layer beneath the adjustment layer. We'll talk more nearly using the Properties panel for different adjustments throughout the tutorial.
You tin also use the buttons in the Adjustments panel to create an adjustment layer.

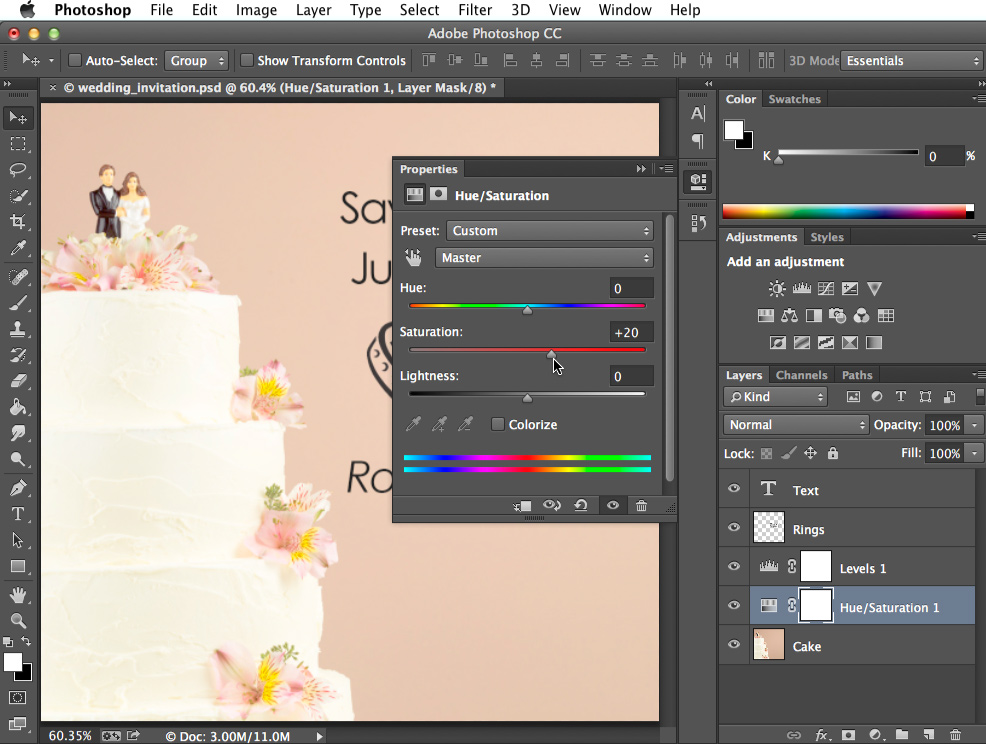
Try this!
In the case file, select the Cake layer, then create a Hue/Saturation adjustment layer. Endeavor using the sliders in the Backdrop pane to see the effect.
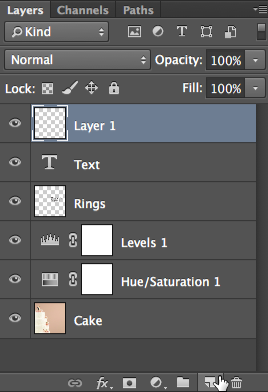
To create a blank layer:
There may be times when you'll desire to create a new blank layer. For example, if y'all desire to draw on an prototype with the Brush tool, you could create a new layer and and so draw on that layer.
To create a new layer, click the New Layer push button near the lower-right corner of the Layers console. The new layer will announced in the Layers panel.
To duplicate a layer:
There volition also be times when y'all'll want to duplicate an existing layer. This is an easy way to try out different edits without altering the original layer.
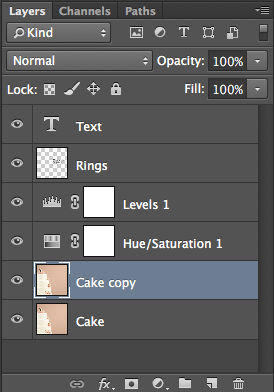
- Right-click the layer, so select Duplicate Layer...
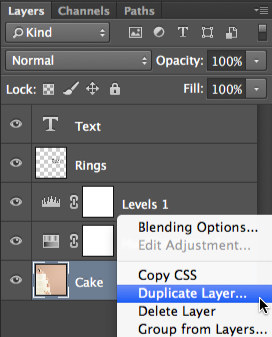
- A dialog box will announced. Click OK. The duplicate layer volition appear.
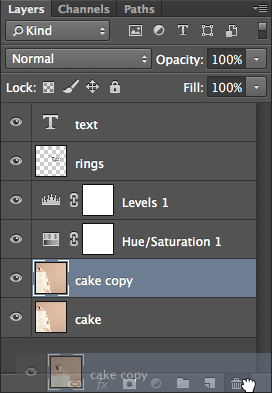
To delete a layer:
If you find that you no longer demand a layer, you can delete it. To do this, simply select the layer and press the Delete key on your keyboard. You can also click and elevate the layer to the Trash Can in the lower-correct corner of the Layers console.
Working with layers
There are many ways to piece of work with the layers in your file. For instance, you tin can show and hibernate different layers or change the stacking club.
Showing and hiding layers
To hide a layer, simply click the center icon next to the desired layer. Click it over again to show the layer. In the image beneath, you can come across that nosotros've turned off the Text layer, and then the text is no longer visible in the document window:
Reordering layers
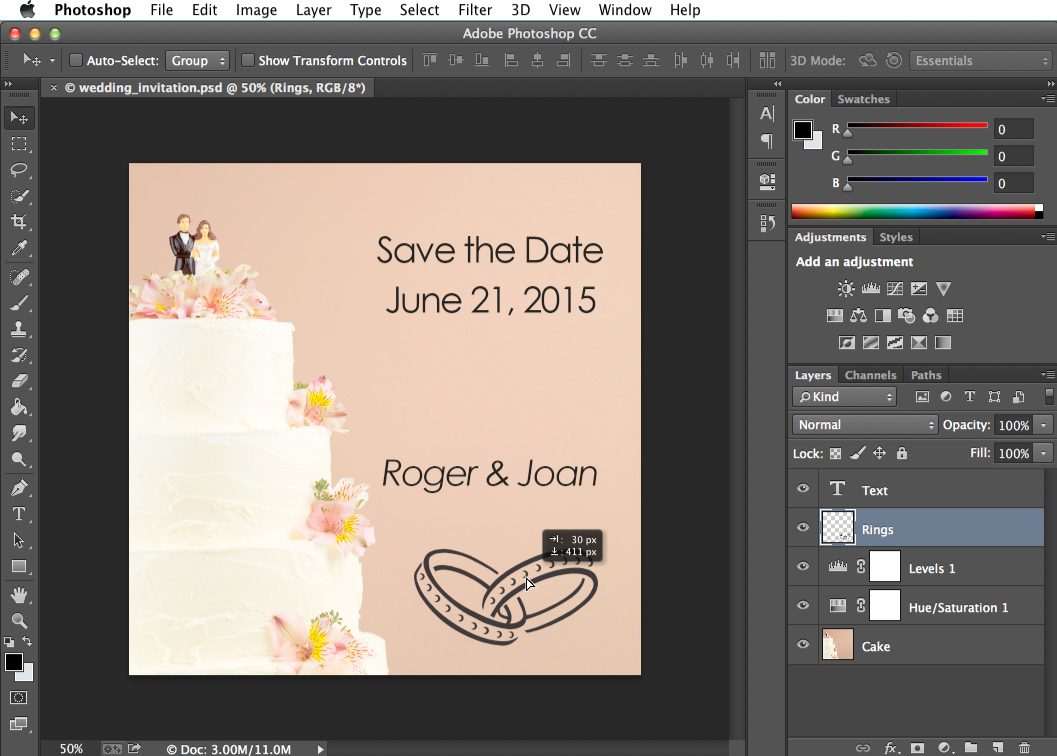
The lodge in which layers are stacked will determine how the document looks. At that place may be times when you need to alter the stacking order. To reorder a layer, simply click and drag the layer to the desired position in the Layers console. In the image beneath, y'all can see that we've moved the Cake layer to the very top, which completely covers up the layers below it.

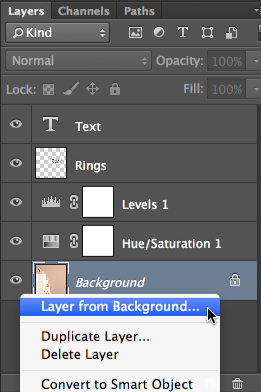
If you want to reorder the Groundwork layer of the image, you will need to right-click it and select Layer from Background. This will convert the background to a regular layer, which tin can be reordered.
Effort this!
Try reordering the layers to see the outcome. Find how moving the Block layer to the very top will completely encompass up the other layers, but moving the Text or Rings layer to the height does not.
Letting layers bear witness through
In the example to a higher place, moving the Cake layer to the top completely covers upward the layers below information technology. By dissimilarity, moving the Text or Rings layer to the top would still permit parts of the layers below to bear witness through. This is because these layers contain transparent areas, whereas the Block layer does not.
What if nosotros wanted the layers beneath the Cake layer to show through? There are many ways to do this, including irresolute the opacity of the layer and adding a layer mask. Nosotros'll cover these options in our lesson on doing more with layers.
Editing layers
The chief advantage of layers is that you can edit or adjust each layer individually without affecting the rest of the file. Every bit we mentioned earlier, at that place are several types of layers you lot tin apply, along with many editing tools. Nevertheless, information technology'southward of import to note that not all editing tools volition piece of work with all types of layers. This will go easier to understand every bit you lot gain more experience with Photoshop.
Using editing tools
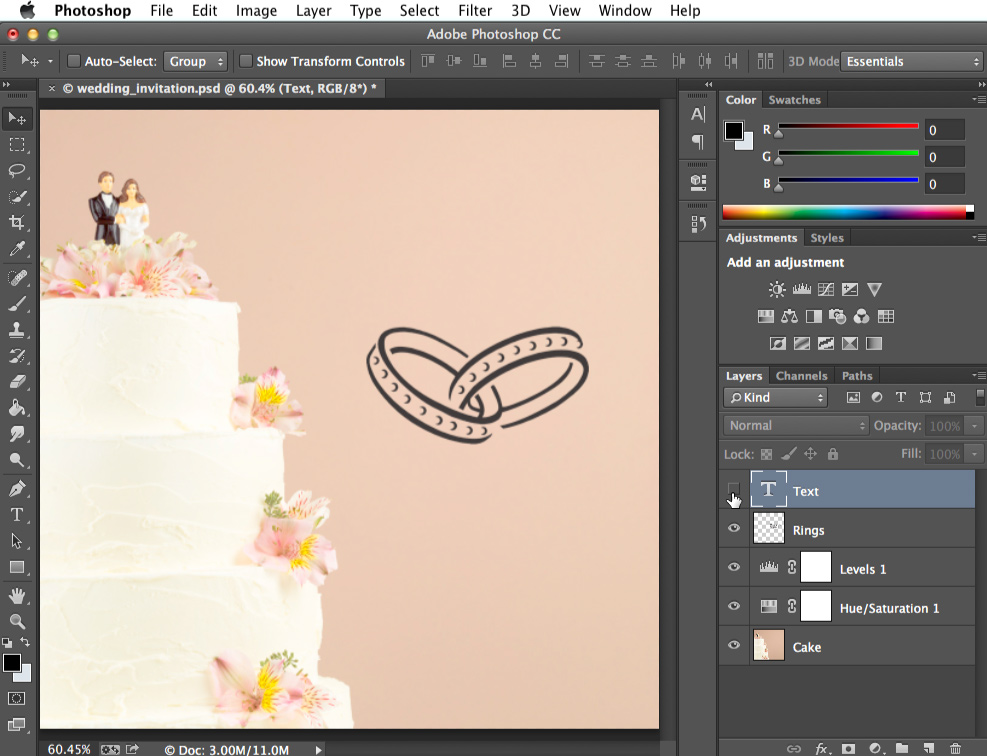
You can use tools from the Tools panel and the Filter card to edit layers. For example, you can use the Move tool to move different layers around in your file. In the image below, we're using it to motility the Rings layer toward the bottom of the image.
Selecting layers before editing
For many types of edits, the desired layer must be selected before editing; otherwise, the wrong layer might exist edited by mistake. If yous use the Eraser tool, for example, it volition simply touch on the layer you take selected. It's helpful to go into the habit of checking the Layers panel frequently to make sure you have the correct layer selected.
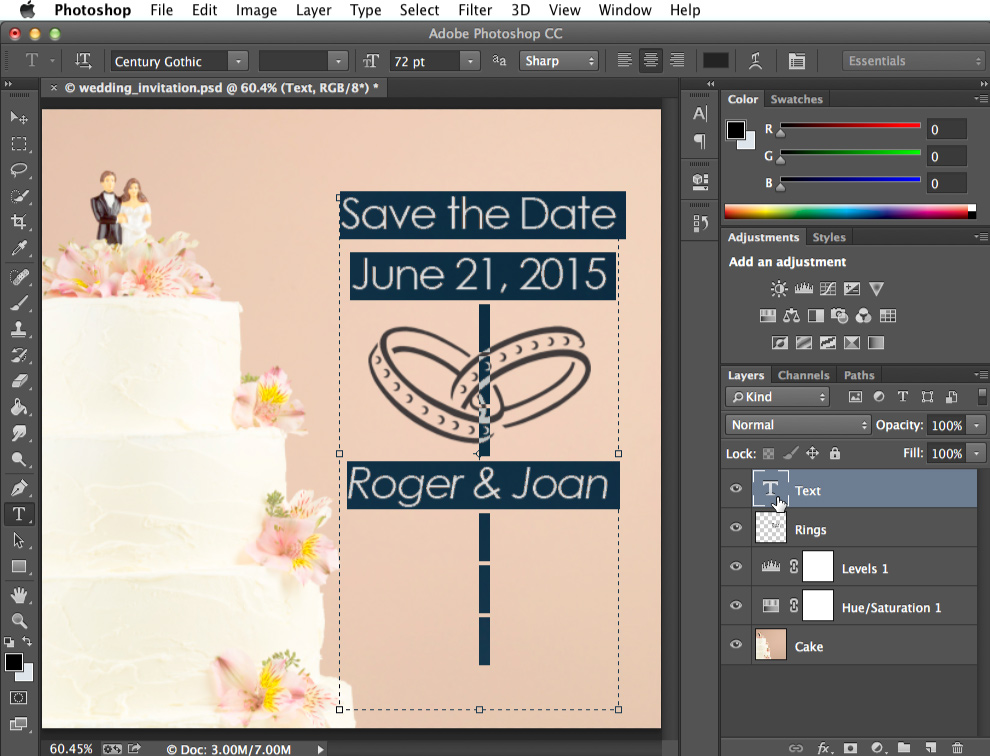
Editing text layers
If you want to edit a text layer, double-click the layer icon in the Layers panel. You can then change the text, choose a different font, or change the text size and colour.
Endeavor this!
- In the instance file, select the Rings layer, then utilize the Move tool to move the layer around the document.
- Double-click the layer icon for the Text layer, then try editing the text. For case, yous could change the appointment from June 21 to June 15.
While we've covered some central information on layers, it's important to realize that there are many different means to utilise them in Photoshop. We'll cover layers more throughout the tutorial, so you'll be able to build on the skills you've learned in this lesson.
Challenge!
If yous'd like to follow along, you can download our case file.
- Open the example file in Photoshop.
- Try turning different layers off and on to see the effect.
- Add together a Brightness/Contrast adjustment layer, and so use the sliders in the Properties panel to adjust the effulgence and dissimilarity.
- Try reordering layers to see the event.
- Save the epitome as a PSD file to relieve your changes. This will preserve all of the layers and then you tin edit them again later if needed.
- Apply the Save for Spider web characteristic to export the image as a JPEG. Make sure to adjust the quality to find a balance betwixt file size and paradigm quality.
/en/photoshopbasics/levels-curves-and-color/content/
Source: https://edu.gcfglobal.org/en/photoshopbasics/understanding-layers/1/
Posted by: juarezfinstiout.blogspot.com
0 Response to "How To Layer On Photoshop"
Post a Comment